top of page

Updated: May 5, 2024

My rosemary, thyme and sage compound butter, or beurre composé de romarin, thym et sauge if you’re posh, is a simple, easy way to perk up your week night dinners for a fraction of the cost of takeout.

Rosemary, Thyme and Sage Compound Butter

Serves: 4

Prep Time: 10 Minutes

Cooking Time: 5 Minutes

Ingredients

1 Stick Butter, Room Temperature (Salted or Unsalted)

2 Tablespoons Fresh Rosemary

2 Tablespoons Fresh Thyme

2 Tablespoons Fresh Sage

1/4 Teaspoon Kosher Salt (Optional)

Instructions

  1. Roughly chop the rosemary, thyme and sage and place it in a medium size bowl.

  2. Add your soften butter to the bowl.

  3. Thoroughly mix the butter and herbs into a smooth paste.

  4. You can use your compound butter now, or roll it into a log shape and freeze wrapped in plastic wrap.

Did You Make This Recipe?

How you went with my recipes? Tag me on Instagram at @transchef.


2,595 views0 comments

Updated: May 5, 2024


Growing up we didn’t have a lot of money. So my family was always looking for a way to stretch a buck. One way we did that was by growing a portion of our meats and vegetables. The times we did buy meats at the stores were normally the cheaper cuts, or when the store would have a sale. One of the things I remember my mom cooking is pig’s trotters. Or as we call them in North Florida, pig’s feet. I remember my younger brother and I thought they were gross. Being kids we’d always start laughing about stinky old feet until mom would get mad and tell us “it’s just bacon with extra fat”. Thinking back now she had us believing most of the pig was bacon. The cooking methods were always one of 2 ways. Either boiled in a pot of collard/mustard greens or rice; or pickled. (95% of the time they were boiled in our house.)


It wasn’t until years later when I was re-discovering parts of my past that I rediscovered the wonder that is pigs feet. Pig feet are low in fat and (the edible parts) are very high in protein, particularly Collagen in tendons and skin. This is very good for joints and skin health. Lets face it, as time marches across our backsides most of us could use all the help we can get!

The inspiration for this recipe came to me from a few of the YouTube Asian lifestyle/cooking channels like Xia jie from shanbei, Souped Up Recipes , 酒鬼小莉 Drunkard Lee and Maangchi (The Queen of Korean cooking!). Each of these channels give really great advise and great fun. (Mandy from Souped Up Recipes is great with comments too!)

The recipe might seem a little daunting to the western kitchen, but when you taste that succulent pork with the crisp fresh and/or pickled vegetables while the complex flavors dance across your taste buds it’ll all be worth it!

Asian Inspired Braised Pork Trotters

Ingredients

2 Medium Size Pork Trotters, Cleaned And Sliced, or Whole

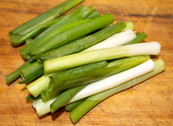
5 Green Onions, Cleaned And Cut Into 2 Inch Sticks (Both Green And White Parts)

3 Inches of Fresh Ginger, Sliced And Unpeeled

1/2 Cup Chinese Cooking Wine

1/2 Cup Light Soy Sauce

1/4 Cup Dark Soy Sauce

5 Large Garlic Cloves, Cleaned And Cut Into 4th

1/4 Cup Chili Bean Sauce (Toban Djan)

3 Large Star Anise

1/2 Inch Cinnamon Stick

3 Black Cardamom Pods, Cracked

1 Teaspoon Cumin Seeds, Roasted

1 Teaspoon Sichuan Peppercorns, Roasted

1 Teaspoon White Peppercorns, Roasted

2 Tablespoons Brown Sugar

3 Tablespoons Cooking Oil (Do Not Use Olive Oil)

Instructions

  1. In a large stockpot place your pork trotters, 1/2 of the green onion and 1/2 of the sliced ginger.

  2. Cover with water until about 1 inch above your ingredients.

  3. Boil on medium high for 20 to remove impurities and any bits of bone fragment. As the water heats you'll notice some scum collecting on the top. Skim off the scum along with any extra oil and discard.

  4. After 20 minutes, place a large colander in your sink and turn the cold water on high to help reduce burns.

  5. Pour the entire content of your stock pot into your colander, rinse until room temperature and all scum is removed.

  6. Rinse the inside of your stock pot to remove any scum that maybe left and place it back on your stove top.

  7. Mix the brown sugar/oil together, pour into your stock pot and turn on medium high.

  8. Stir the oil/sugar mix every couple of minutes to insure the sugar does not burn before the caramel is made.

  9. Once your caramel is made add your pigs trotters, remaining vegetables and spices. Then cover with enough water until 1 inch above your pork trotters.

  10. Cook on medium high until the skin is gelatinous and easily pierced with a fork.

  11. Remove the pot from the burner and turn off the stove.

  12. Remove the pork trotters from the liquid and place them on a sheet pan to cool enough to touch.

  13. Using your impeccably clean fingers remove any bones and discard.

  14. Slice your pork trotters into bite size pieces and enjoy!

Notes

This recipe was written for the stove top, but you could easily use a slow cooker on high for about 4 hours. You could also use a multi-cooker on high for about 25 minutes. (These times are estimates only.)

Did You Make This Recipe?

How you went with my recipes? Tag me on Instagram at @transchef.


43 views0 comments

Updated: May 5, 2024


If you’re looking for an easy, healthy way to perk up your dishes for very little money lacto-fermentation is a great way to do it! It’s been used for centuries to enhance flavor, helps boost our body health, preserve food for leaner months and it still plays a very important part of our lives the world over. In fact, studies on the benefits of fermentation have shown that the consumption of fermented foods is associated with reduced risks of type 2 diabetes, metabolic syndrome, and heart disease, along with improved weight management.


The basics of lacto-fermentation is lactobacillus, or good bacteria, is a salt resistant bacteria that converts the sugars in food(s) into lactic acid. Lactobacillus is a natural preservative that helps prevent bad bacteria growth, increases flavor and nutrients.


To get started with lacto-fermentation you really only need a few things and they’re all things that most of us already have in our pantry. Salt, vegetables, water, some sort of food safe container to contain everything and time. You can also ferment pretty much any vegetables, and meat, you desire. So the sky really is the limit!


In this recipe I’m going to show you a easy recipe that I use multiple times per week that works as an ingredient in almost any dish or a condiment for burgers, wings, dogs, etc.

Fermented Garlic And Ginger With Chilies

Serves: 100

Prep Time: 15 Minutes

Cooking Time: 14 Days

Ingredients

3-4 Medium/Large Jalapenos (Whole or halved)

10 oz Whole Garlic Cloves (Halved is fine too) Enough Water To Cover

3 % Salt By Weight A container large enough to contain your vegetables and water

Instructions

  1. In a large bowl add all ingredients, minus the salt and water, and mix completely.

  2. Place your empty Mason jar, or container, on a kitchen scale and tare it.

  3. Pour the chilies and garlic into your empty container.

  4. Pour in enough water to fully cover your chilies and garlic. You do not need to fill the container completely.

  5. Check the weight of your filled container and write it down.

  6. Using the weight of your filled container, multiply the weight by .03 to get the total weight of salt needed.

  7. With a clean kitchen cloth, or paper towel, clean the threads of your container.

  8. Attach your air lock to your fermentation lid and then attach the lid to your filled container.

  9. Sit your container in an out of the way location in your kitchen and allow to ferment for 7-14 days.

  10. Once your pickle reaches the desired level of fermentation replace the fermentation lid with a water tight lid and store in the fridge.

When you're ready to use your fermented chilies/garlic simply remove the desired amount and chop as needed. You can also use the brine in any number of ways like sauces, marinades and even deserts in some cases.

Notes

Keeping your fermented pickle in the fridge will slow down the fermentation, but it will not fully stop it. If you wish to fully stop the fermentation process place your sealed container in a pot of boiling water and allow to bail for 10 minutes. This should be enough to kill any live fermentation bacteria, but it will reduce the freshness of your pickle a bit.

Did You Make This Recipe?

How you went with my recipes? Tag me on Instagram at @transchef.


243 views0 comments
bottom of page